 |
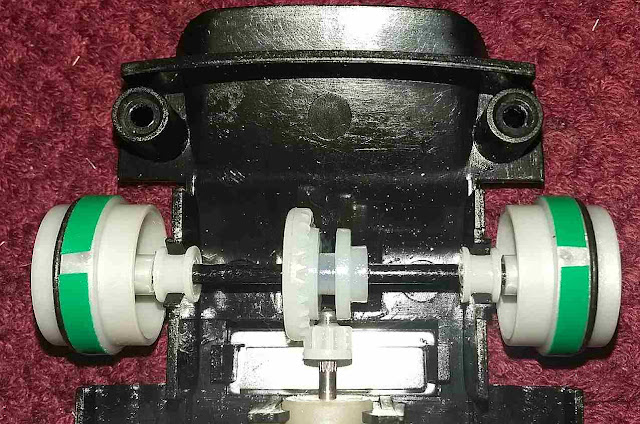
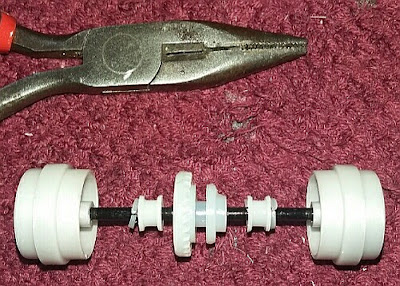
| Dave carries a large stock off free pair skinny magnet, 2.5mm thick front O ring, 1.0mm thick rear O ring and one pair "just in case" rear axle plastic spacers as per Ecurie rule 3.3 - just ask and you will receive these. There are other Ecurie experienced who will have similar. My own current source: Strong-Rare-Earth-Bar-Neodymium-Magnets-N50-25x5x1-5mm O ring 2.5mm thick by 17mm or 18mm OD |
01 December 2016
Costa concept stock inline car race preparation 2016
10 August 2016
New Hotslots Pmb track race video
Macho Mart's Leon achieved something special by managing to follow this A main dice between Lance Cranmer (orange car on black lane), Dave Greer (yellow car on Red lane) and Hadley Woodroffe (black car on yellow lane).
The lap and a bit down Dave's yellow car catches up to Lance and Hadley on the outer lanes but both immediately lift their game so that Dave cannot pass to try catch up the lap deficit - that only being achieved on Dave's next lane (white) but thereafter both Lance and Hadley pulled away to give Lance 1st, Hadley 2nd, Dave 3rd, Oliver Wills 4th and Dave Gush 5th.
The mob in the pits at briefing and the hand over by Oliver of the obligatory beer to Chairman Arthur, along with the special plaque to be mounted on the track commemorate Arthur's drive and dedication to making the new wood track a reality.
Then it was on to race day action for the 25 participants from the Hotslots Pietermartizburg and Ecurie Durban clubs.
The very first race heat on the new track for driver, Ross, one of the Jacoby twins, Byron and Rodney.
Marshalls ready for race action.
Drivers Gavin, Dave Gush, Freddie, Ashwin, Chris and Tony in one of the heats.
Leon, Kevern and Keith busy in the pits.
Finals results for the absorbing afternoon's racing.
07 March 2016
Britain's best kept clubbie slot car secret? ;-)
I have enjoyed experimenting with transistor slot car controllers ever since assembling a Difalco Junior kit I obtained through Gustav Heymann at the turn of the century. That controller sparked a series of scratch builds, although I have to concede that that ultimate value was still enjoyed from the over the counter Professor, Difalco and Truspeed buys I eventually settled on for magnet plastic slot car racing.
Transistor controllers remain relatively easy for the owner to maintain, often just a transistor replacement being all that is required.
One and half decades later and midst a softening Rand for South African slot car racers, it was rare treat to again trip over another inexpensive transistor controller byo kit for a donor Parma Turbo chassis (with thanks to RC friend Stan Haussman), available at modest price through the link below, along with detailed graphics and instructions:
Even for total novice slot racers, the kit is simplicity itself to wire up. I was fortunate enough to entice returning slot car racer and multiple South African champion Johan Louter in to tackling it as an initiation to transistor controllers. Transistor and PWM controllers are new concepts for Johan, who still retained his trusty rectifier diode controller from when he retired from racing just after the turn of the century.
Pardon the fuzzy cell pics of the final product, which is ultra compact, clear of controller case top clutter and very light, given the Turbo chassis combo:
I did much googling to try find some outside commentary on this excellent kit, which Truspeed's Steve Hill had evolved as an inexpensive option for Britain's clubbies to put together. An unusual element not seen on other transistor controllers is the use of transistor braking as opposed to the normal wire wound or diode pot, along with the brake and hold feature mentioned in the Truspeed blurb. The total lack of Google find reviews or commentary thus convinced me to publish this on the blog and get the word out. I can only assume the clubbie's were keeping this gem secret to themselves. ;-)
The main test vehicle for the controller was my open magnet racer Slot.it GT40 with trusty Scaleauto 35K red motor. This combo has been a useful Ecurie open and handicap option for me but pretty much red lined at 4.5 second laps on the Ecurie track. The outright lap record for open magnet had previously been set at 4.3 seconds with Lance Cranmer driving my Proslot Toyota GT1, also powered by the Scaleauto red 35k motor.
After being suitably impressed at my own efforts with the Truspeed and the GT40, it was time to entice Lance back for another crack at a useful lap time. He too was impressed with the knife through hot butter feel of the controller and, as per the pic below, the rest is history with a new outright lap record and constant 4.2 second laps.
The same car / controller combo also broke the laps final record at the recent open magnet event. :-)
Truspeed have now gone one better than their Transistor kit and will be producing a complete transistor controller at a very good value price:
Truspeed BP2 transistor controller
Update:
Friday 22 April Open Handicap - extract
"Secondly, the Truspeed controller continued to weave its magic with the aging Slot.it GT40 and not even its owner in his wildest fantasies would have contemplated again breaking the laps record, this time by a whopping three laps, to take it to 156 laps, like Ash did with 1/24 production record earlier in the month."
Latest and final update:
Friday 26 August Open handicap - extract
"From a personal perspective, the steady improvement had looked red lined at 157 laps, although last month’s 157.96 was knocking at the 158 door. Qualifying was very, very nervy and the race only slightly less so but it is with thanks to Truspeed controllers and track-clean Lance that the same GT40 frog-leaped the plastic race record by almost four laps to the new ultimate record of 161.69 laps. Whilst I am confident that Ash, Lance and co. will soon attain same and beyond, it is time to tick the 160 lap holy grail box and retire the GT40 and slightly crazed speed to shelf queen status."
The ultimate best lap time with the BP Controller:
Sub 4.2 second lap time with the brand new production version Truspeed BP2 controller, which features adjustable spring tension (the plug mounted pot not required):
Subscribe to:
Comments (Atom)


