NEXT RACE INFORMATION

WHEN: Most Friday evenings. TIME:
...................................................................................

05 June 2019

Ecurie Professor throttle controller quick and dirty guide

The excellent Professor controllers have been an Ecurie go to for some years and personal preference has swung to the dual transistor plus heatsink versions, now available from Raceworld in Cape town in fixed sensitivity and brake version:


This guide is for fitting the stage one to stage three adjustment controls - Professor does strongly recommend (no I don't know why not the earlier compact version) this 25 ohm sensitivity potentiometer for these controllers despite the fiddly fit requiring short wires, so I ordered accordingly:


Per Professor: "This pot is used ONLY on the newer version circuit boards that are fitted with or have the capability to have dual transistors installed - That includes controller model numbers PMTR2104, PMTR2106 and PMTR2130 AND may also be used at times in other models." 

This the Professor version brake potentiometer, although one can leave the wire bridge in and externalise with pretty much any after market 5 watt 25 ohm (ish) wirewound potentiometer as I have done on top of the three pin plug in pics below, simply splice in to the "red" brake lead (nicely marked by Raceworld) and leave the brake bridge intact:


Stage 1: Fine for clubbie magnet racing and 1/24 production, the bridges shown in the bottom pic, un-solder for which ever potentiometers you are fitting, that is all that is necessary for this level of racing:


The stage 2 fixed sensitivity average resistor of 8 ohms only needs to be switched for a 4 ohm (between 2 ohm and 5 ohms is fine) if you intend doing 1/32 plastic non magnet racing ala the Slot.it South Africa series and require a softer bottom end sensitivity - very likely voids warranty.

The resistor cut is to splice in the stage 3 Cranmer Curve 50 ohm preset if you considering doing plastic non magnet racing only - very likely voids warranty.

The pic below illustrates the fiddly fit for the recommended Professor Sensitivity potentiometer - shorten the solder tabs right down and it will fit with a push and turn to locate as shown:


The stage 2 and stage 3 tweaks can be ignored for most clubbie magnet and 1/24 racing, the pics below show the location of the 50 ohm Cranmer Curve pot super glued in and accessible through the controller top. A quick test on the home brew tester and the controller working sweet:


This very crude (but surprisingly effective) Cranmer Curve preset emulates the variable resistance boards used in top end transistor controllers, by changing the final "step" in the resistor chain. Sir Lancelot himself indeed finding it useful in other classes as well.

There we go, a controller for all my racing needs from 1/32 plastic Slot.it non magnet series right through magnet and on to Falcon and S16D type 1/24 metal racing, as we will encounter at Raceworld. 


21 April 2019

Plastic track rubber tyre pre-scrubber, a first?

The proven method of the tyre preparation for the Slot.it South Africa non magnet racing series has been lots of plastic track time and benzine or lighter fluid tyre cleaning.

Took us wood track magnet racers quite a while to come to terms with that, compounded by not  having a coastal plastic track to achieve same....

Whilst looking at online tyre saucing machine (not applicable for this game) we challenged local Guru Lance Cranmer to come up with a gizmo that would achieve the same result as the scores of laps and copious tyre cleans a plastic track achieves. Ruaan of Modeltech had kick-started us on to track trued rubber tyres and he too was taken with the same idea.

Lance did just that.....

I collected my neat and solid 3D printed box with lathe trued and ball bearing scuff roller a week ago and was promptly waylaid by hospital visits before I could test drive for this report but am pleased to report that it is an extremely worthwhile nominal investment.

The neat 3D orange box with ball bear bearing scuff roller is mated up to a power source pretty much anywhere from 3.7 volts (single lipo battery) to about 6 volts - I used a RC charger in motor mode in my case, allowing me to experiment with different voltages at 4, 5 and 6 volts.
The unit is taylor made for the popular long Slot.it Lola LMP Chassis (ignore redundant magnet from wood racing) but can also cater for anything smaller by simply turning in the large plastic bolt till the rear axle aligns over the centre of the scuff roller. Pretty much any slot.it pod will do but I was eventually pleased with the inline pod weighted down with the Boxer motor, proving to run cool even at 6 volts. 


A set of Slot.it N22 (20mm) tyres was carefully fitted on to a 16.5 rim, along with a harder Sideways Prospeed (19mm) tyre on a 17.3.mm rim. I had been pre-warned to seat the tyres carefully and that paid significant dividends as the combo ran smooth as a baby's bum from the get go, despite the back ground noise evident in the video. A short run at 5 volts to check for smoothness and then ten minutes at 4 volts with the N22 provided a smooth finish pretty much as promised. 


I then went a bit over the top in experimenting with benzine on a rag and different voltages - the benzine really not required to aid truing as there is zero track dirt to be removed ;-). The tougher soft prospeed proved a longer exercise and three sessions of twenty minutes got me to where I was after.
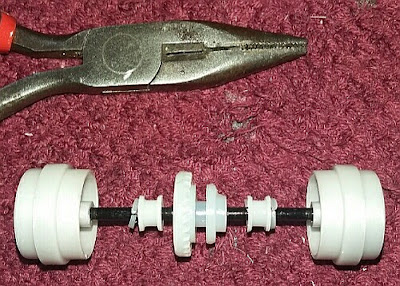

The part that tickled me most was how the unit auto aligned itself and ran true as a die!

The Prospeed eventual tyre finish immaculate, as can be seen from the pic. The N22 also buffed up glossy and shiny like the fancy tyre cleaners and were carefully put away for track use in due course.
This unit will save time for all racers, including those with tracks, in minimising much trackside tyre preparation :-)


18 December 2017

Open & GT car prep for newbies

As much notes for myself as a couple of tips for the newbie assemblers of Slot.it pod type chassis - recommended is 0.75mm SW pod but 1.00mm will also do, provided the magnets ever so slightly recessed (only by feel):

A useful kit complete with 61 smaller cut off wheels for motor pod.

Illustrating the plastic swarf build up on the small cut off disks, change regularly and typically six per pod project for clean accurate cutting. The smaller disks allow access to the inside rear.

Needle file roughening edge of magnet. The process relies on support for both front and rear long sides of the magnet, for the front and rear location.


Warm the tubes in just boiled hot kettle water, mix and paint on to the nylon before fitting magnet which should be only just below (by feel only) the edge of the plastic (NEVER ABOVE). Keep the tubes stored vertically in a similar container [Oliver tip] thereafter. Once happy with location and the glue dried a bit, reinforce with a couple drops super glue from top (inside).


Rough cut the front slot and finish with a needle file so the magnet clips in tightly for maximum support of the magnet. Use two stacked of the Professor 27x5x1.5 magnets at the rear and one 25x6x1.5 (any up to max two mm thick like Slot.it 25x8x2) at the front. The maximum downforce is to be biased to the rear. Again only just inside surface by feel. Note front magnet position has proven important and whilst the Slot.it magnet holders remain, do not use them (creates edge of the cliff downforce, not good). Rather stack trimmers on existing magnets.


The fitted magnets with Black Wonda Fix (only use black never the clear) around the edges, both reinforced with a drop or to two super glue from the inside.


Trimmer magnets added, a must at the back and a Slot.it magnet has proved an ideal trimmer at the front, in the past.


VERY IMPORTANT - reinforce the front axle supports with black Wonda fix at fore and aft of the axle supports (zoom pic if battling to see). Fit the motor pod and tighten the screws just enough to allow the pod to slip fore and aft about 1 mm travel (also important, do not lock up the pod).

The rest of the story will follow in due course ;-)

31 May 2017

The amazing Slot.it GT40

The GT40 remains the open beastie to beat but only just lost fractionally by same lap total only to the Chris's Mosler in September (200 laps) and then Dave's own new Black Arrow Ferrari 458 with Olifer chassis in October, driven by Sir Lancelot (196 laps). The 3D chassis with Slot.it pod fittings are proving superb and almost bullet proof, as the recent three hour enduro with the Amato 3D Mosler chassis for Slot.it proved :-)

Black Arrow Ferrari on Olifer 3D chassis for Slot.it pod

Underneath of the NSR Mosler with Amato stiffer Mosler chassis (Scaleauto motor later changed to BRM).

Scroll forward to 26 August 2017 and the GT40 now, after quite some development, has a competitive stable mate in the form of the Led Zeppelin McLaren M8, which has been a long time shelf queen for obvious reasons but proved surprisingly robust and a proper traffic scooper in action. Both cars qualified on equal laps but yours truly was spooked by the Pmb Hotslots lads threatening (and looking it) the 200 laps barrier, so decided to stay with the proven GT40. This time it was Sir Lancelot and the Raw McLaren F1 who got the hole shot (and his first 190) and had to be chased down from a couple laps behind, so quite surprised the GT40 knocked off the outright Hotslots open laps record by an additional one lap to 196.360.

The GT40 has enjoyed the outright laps record at Ecurie Durban and Hotslots Pmb for a short while now, so time to switch tack to the M8 for Ecurie as well, where the traffic poop scoop element is vital and the more fragile GT40 not able to sustain the high speed traffic damage.


This one may be the last post before Photobucket possibly ruins much of my blogs. Again the GT40 had to come from two laps behind the Chris Mosler to improve the Hotslots laps record to 195.070, this past Saturday 22 July 2017. A small but significant mod to the Professor controller seemed to give the extra finesse, along with a pre race controller service by Lance. Still a fragile open option for most though, the GT40 finished the race with no front axle supports and front wheels......


Just had to record it for posterity but have to claim this Hotslots one for my controller of choice for the Pmb track, currently being the knife through butter double transistor commercial track Professor, which has also proved just the ticket for the South African non magnet Slot.it series, as well.

More by accident than design the same yellow Slot.it GT40 with Scaleauto red 35K at May 2017 now holds the outright open laps record for both the Ecurie Durban and Hotslots Pietermaritzburg tracks, against the field of Moslers et al.


06 April 2017

Formula Libre Pro prep for the metal heads

The Scalextric Lotus Evora super resistant and Ford GT40 are the competitive cars for the Ecurie Libre Pro (with original motor) class at present.

Gavin asked for a shopping list and Paul is commencing preparation of a new Lotus Evora super resistant so this takes the form of a list of recommended bits plus some pictures guide, rather than the blow by blow assembly guide for stock.

Parts sourced locally in Kzn (generally):
Parts sourced overseas:

*         The Slot.it LMP braid is quickly and easily trapped against the guide silver braid shoe and one then threads the lead wire through the hole and (very) quickly solders the wire to the braid (see photos).
          The Mr Slotcar braid is significantly longer lasting but fiddly to tin the end for soldering in view of the capillary action.
**      The only reason for a spacer is so the spur gear does not load against the lip of the pinion during right hand turns, which will load and ruin a motor.
***      The Slot.it 36t 19mm is ample (until worn) but the yellow MB spur is silky smooth and looks zooty.
****    Ash and Dave experimented with a range of different diameter rims (17.3/17.5/18.0/18.3) but the 17.8mm rib diameter rim gives the sweet spot on handling and co-incidentally is the same size as the original plastic rim.
*****   Not a must but nice for body float and the body rear - the coarse Ninco long star screws are great whereas the more common flat head after-market body screws are a pain.

Remember that the Ecurie Formula Libre Pro rules require the magnet relocated to forward of the motor and one should then stack magnet pieces on to achieve the 150 grams target downforce on the Rix scale (minimum 145 grams recommended).

Similar components but different wheel sizes will apply to the Scalex Ford GT40, talk to Ash, Andrey and Lance for sizes. Changing the pinion 11t to 12t will make also make it suitable for Hotslots Pietermaritzburg sports & touring use but remember to change back to 11t for Ecurie! ;-)

Front wheel diameter 16.9 mm (changed)

Note lead wire / braid plus magnet location

LMP braid quick but short term solution

Not cheap but neat rear 17.8 mm rims

36t 19mm spur gear alternative


01 December 2016

Costa concept stock inline car race preparation 2016

Buy the excellent Scalextric GT Lightning and a pack Ecurie stock class rule 8.1 specified Slot.it S2 tyres, along with the option useful investments for the future in the form of cheap 3mm wide trim stripe tape, needle point oiler with thin oil and lighter fluid for cleaning (original can is ok but needle point bottle useful). 
Dave carries a large stock off free pair skinny magnet, 2.5mm thick front O ring, 1.0mm thick rear O ring and one pair "just in case" rear axle plastic spacers as per Ecurie rule 3.3 - just ask and you will receive these. There are other Ecurie experienced who will have similar. My own current source:
Strong-Rare-Earth-Bar-Neodymium-Magnets-N50-25x5x1-5mm
O ring 2.5mm thick by 17mm or 18mm OD
With guide plate in place, flip the top pair braids (brushes) forward as per left in pic. Now only carefully remove the guide plate by sliding forward then lifting rear. Rotate the guide plate 180 degrees and refit per the right in pic. Use will decide if you should trim the rear longer braids but most do and some also replace with other brand braids. This now redundant as Ecurie has amalgamated the GT Lightning Pro and Stock classes and one may now dispense with the clip in guide plate and fit the braids directly to the guide as well, whist Hotslots even allows a switch to a Slot.it guide. The O-ring fronts can also be switched to Slot.it front tyres. Tony at Durban and Oliver at Hotslots are still showing the stock form running gear and wheels to be competitive, though. Now ease the 2.5mm O rings on to the outer front wheels, so the O ring is not "twirled" in the process. I prefer not to glue, if you really must then nail varnish or ask uncle Lance to MEK secure - DO NOT superglue.
The Scalextric wheel centre rib is wrong for Slot.it and other non Scalextric tyres and must be built up with a single layer of trim tape and widened with a single 1mm O-ring on the outside (no glue). Start and finish the trim tape so the rib "pimple" is in the gap, obviating any need to shave the pimple. 
Ease the Slot.it tyre on, sidewall writing inwards (so the ruffle edge also inwards) and "knead" the tyres till well seated and a totallly flat finish with no sign of rib (the sunken cheek finish is what kills the stock motors). Never sand S2, makes the tyre too sticky for stock motors.
The only place I use glue on the whole car, if needed to stop the motor rocking (some motors are tight enough). If you really must remove the motor for any reason, lift at this front point or you will break the rear motor mount. 
The skinny magnets are boon as one can leave the original magnet in place and stack add the skinny magnet without popping out the motor or axle. I break (do not Dremel as heat kills the magnet) the last 20% so that the 80% will clear the plastic clips and sit flat on top of the original magnet. I then stacked the little 20% piece on top (per pic below) and the car came out just shy of the spec 180 gram downforce per Ecurie limit. Use bits of the spare magnet to trim to same, it is worth the time and effort. The finished stack should be pushed forward to the motor mount and will be well clear of the gears. 
Never run a stock motor "wet" with any kind of muti, it burns the commutator black. Dribble in some lighter fluid through the the top little square holes till the bottom of the car is damp then stop and wipe excess. The hi-tech RC approach is to use a slave motor to turn the car motor to seat the motor brushes, the lower tech Mike Wilkie approach of spinning the rear wheels by hand gives plenty gearing to do the job - sitting in front of the tv for ten to fifteen minutes is ample manual run turn time. Once dry then oil all the moving parts of the motor, axles and gears with your new pin oiler or similar.
Ecurie is strict on no butchering of plastic cars so the simple solution is toss the fragile spoiler up front. If you really must fit it then this is the one time you will be forgiven for butchering the locating pins shorter and then bumper taping the spoiler directly on to the car body. Carefully screw the body on to the chassis with the original screws so that the body is loose enough to give about 1mm gap front and rear, there should also be a tiny amount of sideways body float at the rear.
You are ready to run, most cars are fine but some (not all) show excessive rear end axle float, which manifests in a motor killing "Grrrrrk" through the long bends. You should immediately stop as you are hurting the motor and it is time for those "just in case" plastic washers per Ecurie rule 3.3, Dave gave you up front.
This gets tedious and fingerprint removing but one needs to sand the the washers to half the thickness (no don't just put one in, it must be balanced or the motor will run tight). Note the slit (with scissors or knife) so that one can twist and fit over the axle after completion.
This is for example only, just to show where the thin spacers go. Never pop the axle out more than once or twice or you will eventually be obliged to glue the bushes in - you are warned. If the axle still spins freely and the "Grrrrrk" is gone through the long turns, you are now ready to race :-)

Regular maintenance is a must. A day or two before each race night (or minium couple of hours), repeat the lighter fluid dribble through the top of tmotor, clean the mess and manually rotate the wheels for a minute or two only. Then oil sparingly and wait to race. Running the motor "wet" is an anathema, it will bring a short term gain for the first few laps but kill the motor in the not so long run. Also avoid thrash practicing with your new race car for long periods on race evening, just a half dozen laps maximum to settle. The advance motor preparation will give you consistent good performance throughout the evening. 

10 August 2016

New Hotslots Pmb track race video

Macho Mart's Leon achieved something special by managing to follow this A main dice between Lance Cranmer (orange car on black lane), Dave Greer (yellow car on Red lane) and Hadley Woodroffe (black car on yellow lane). 

The lap and a bit down Dave's yellow car catches up to Lance and Hadley on the outer lanes but both immediately lift their game so that Dave cannot pass to try catch up the lap deficit - that only being achieved on Dave's next lane (white) but thereafter both Lance and Hadley pulled away to give Lance 1st, Hadley 2nd, Dave 3rd, Oliver Wills 4th and Dave Gush 5th.


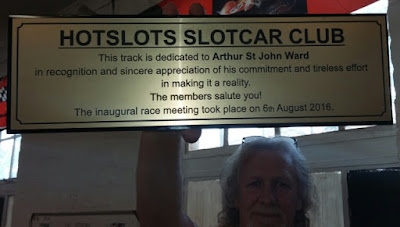
The mob in the pits at briefing and the hand over by Oliver of the obligatory beer to Chairman Arthur, along with the special plaque to be mounted on the track commemorate Arthur's drive and dedication to making the new wood track a reality.


Then it was on to race day action for the 25 participants from the Hotslots Pietermartizburg and Ecurie Durban clubs.


The very first race heat on the new track for driver, Ross, one of the Jacoby twins, Byron and Rodney.


Marshalls ready for race action.


Drivers Gavin, Dave Gush, Freddie, Ashwin, Chris and Tony in one of the heats.


Leon, Kevern and Keith busy in the pits.


Finals results for the absorbing afternoon's racing.